Back to Contents Page

Battery Latch Assembly

Dell™ Studio 1535/1536/1537 Service Manual


Removing the Battery Latch Assembly

CAUTION: Before you begin the following procedure, follow the safety instructions that shipped with your computer.
  1. Follow the instructions in Before You Begin.

  2. Remove the base cover (see Removing the Base Cover).

  3. Remove all memory modules (see Removing Memory Module(s)).

  4. Remove the hard drive (see Removing the Hard Drive).

  5. Remove Mini-Card (see Removing the Mini-Card).

  6. Remove the processor thermal-cooling assembly (see Removing the Processor Thermal-Cooling Assembly).

  7. Remove the processor (see Removing the Processor Module).

  8. Remove the center control cover (see Removing the Center Control Cover).

  9. Remove the keyboard (see Removing the Keyboard).

  10. Remove the display assembly (see Removing the Display Assembly).

  11. Remove the palm rest (see Removing the Palm Rest).

  12. Remove the optical drive (see Removing the Optical Drive).

  13. Remove the system board (see Removing the System Board Assembly).

  14. Remove the latch spring.

NOTICE: Before you remove the latch button, observe the orientation of the latch to ensure proper installation when the latch is replaced.
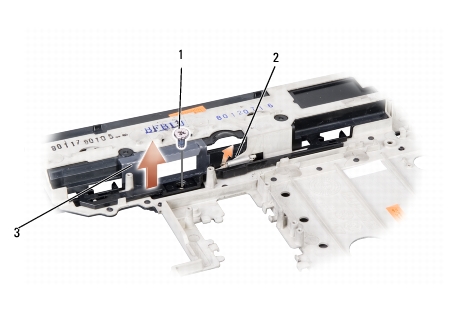
  1. Remove the screw from the battery latch and take the latch out from the computer base.

1

screw

2

spring

3

battery latch assembly


Replacing the Battery Latch Assembly

CAUTION: Before you begin the following procedure, follow the safety instructions that shipped with your computer.
NOTICE: Ensure the battery latch assembly is properly oriented. The indent for the screw should face up when installing the assembly.
  1. Slide the battery latch assembly into place.

  2. Replace and tighten the screw securing the battery latch to the computer cover.

  3. Follow the steps in Removing the Battery Latch Assembly in the reverse order.


Back to Contents Page