
Dell™ Studio 1535/1536/1537 Service Manual
|
|
CAUTION: Before you begin the following procedure, follow the safety instructions that shipped with your computer. |
|
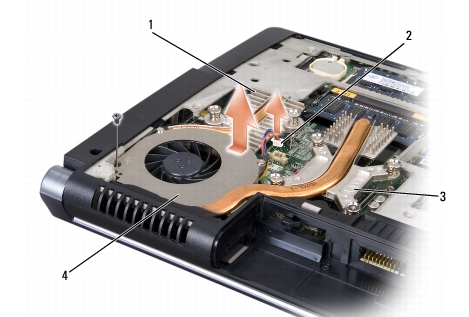
1 |
thermal-cooling assembly sink |
2 |
fan cable |
|
3 |
thermal-cooling assembly processor cover |
4 |
thermal-cooling assembly fan |
|
|
CAUTION: Before you begin the following procedure, follow the safety instructions that shipped with your computer. |