![]()
![]()
![]()
![]()
![]()
![]()
|
|
|
|
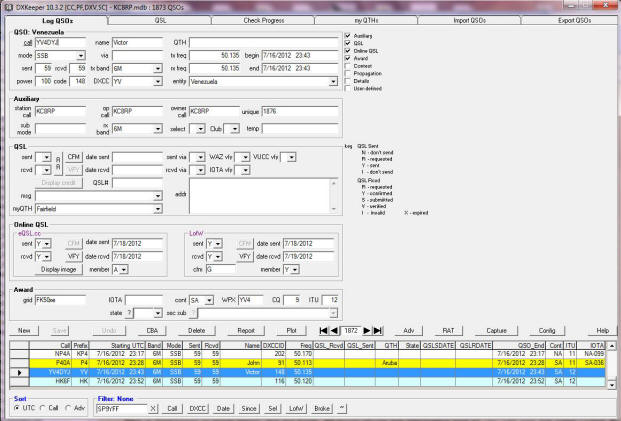
This page shows setup of the Log Book, DXKeeper
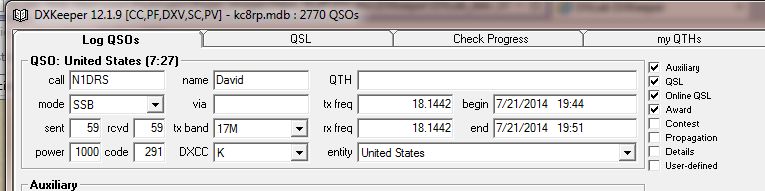
This is DXKeeper is the log book. All applications are integrated and as you can see are color coded. Both the Spot collector and DXKeeper share the same color coding. This is very useful when watching for needed entities or band fills. Yellow indicates LoTW user, Pink is for eQSL and blue indicates both are used. Notice the check boxes to the right at the top, they determine what information boxes will be displayed. I will us YV4DYJ as an example in the following screens.
The QSO box fills in with spot data and QRZ information. You will usually have to add name and QTH but that is not necessary.
This box I do not use but I showed it for clarity. This is for club and other work.
The QSL box gives you the status of any paper QSL requests. The myQTH box is setup in configuration discussed later, it also allows for multiple QTHs. In the sent box, a drop down box, you can select Y if you have sent a request by B (Bureau), D (Direct) or E (Electronic). Many DXpeditions do not really want your QSL card, who would want 10,000 or more QSL cards, they really only need your QSL request and info. I use the E when I use the online electronic request. The rcvd is the same format, the different options are shown to the right. The msg, myQTH and addr are used for generating QSL cards.
This is the box I use the most. Most everything in this box is updated automatically, this is done under the QSL tab. The most important part is the confirmation which means either eQSL or LoTW has the confirming QSO. The member A under eQSL means the contact is authenticated an is eligible for eQSL awards. You can also set an display directory and down load the QSO card for future use. Member Y under LoTW indicates the contact is a LoTW member.
This part of the log deals with what is in the database, the log. The background colors are the same for the Spot Collector. You can configure what the log displays and move the columns around. The buttons across the top perform the following functions
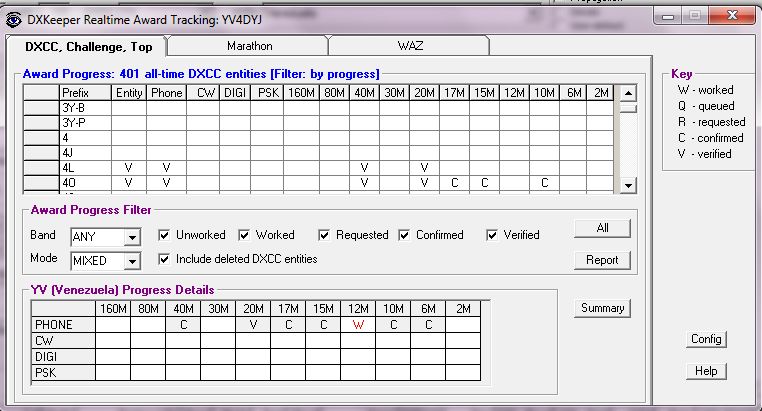
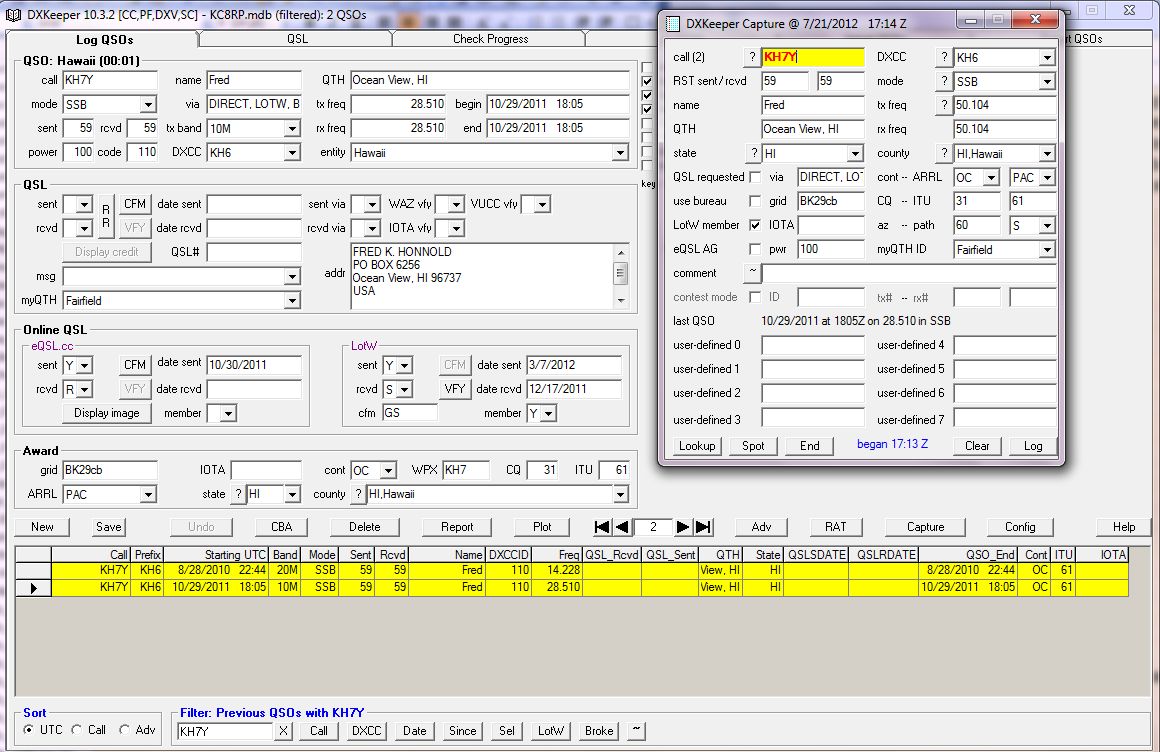
RAT can show you your progress on all bands and especially for the selected log QSO. The Capture screen will take the selected SC spot and prepare it for logging, see below.
The capture screen shows the contact selected from the Spot Collector. I over laid it on the logbook to show the results if there were any contacts with that call previously. I usually have DXKeeper minimized so I rely on the capture screen to inform me of a previous QSO. The capture screen is used to start and stop the QSO times, to show contest serial numbers, Spot the contact etc. The biggest thing to remember is to click Log when done or nothing is put in the log. The Config screen we will deal with later. The bottom log buttons are for sorting and searching. Sort is self explanatory. Filter box is really helpful when trying to find a particular QSO or QSOs. Clicking the X will return the log to normal. The rest of the buttons deal with what has been entered in the filter box, hover over them and the function will be displayed. The Configuration screen
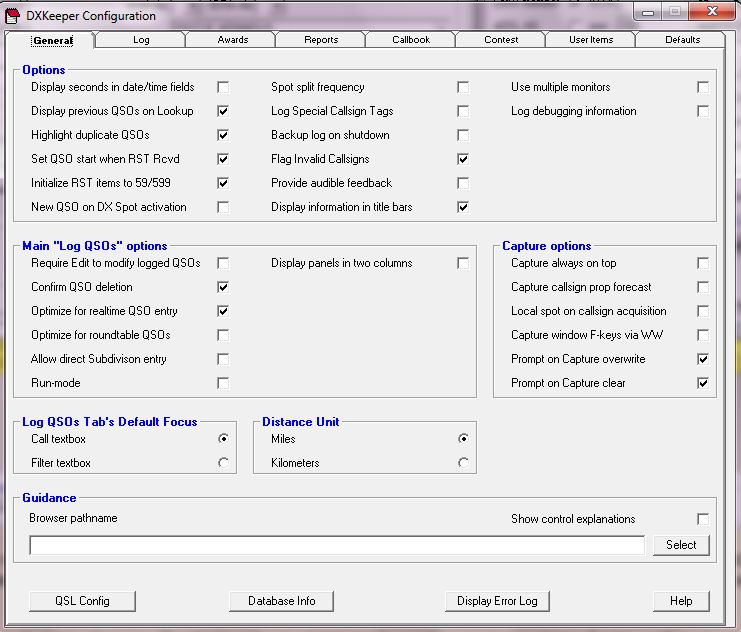
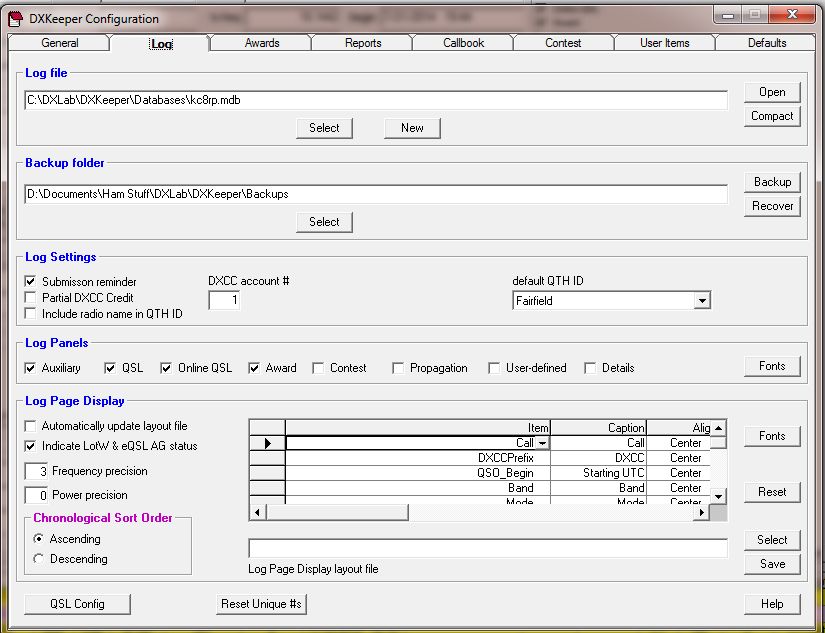
The configuration screen has many options for setting up the logbook. Take some time to explore and do not forget the Help button, it is very helpful, HiHi! Log tab
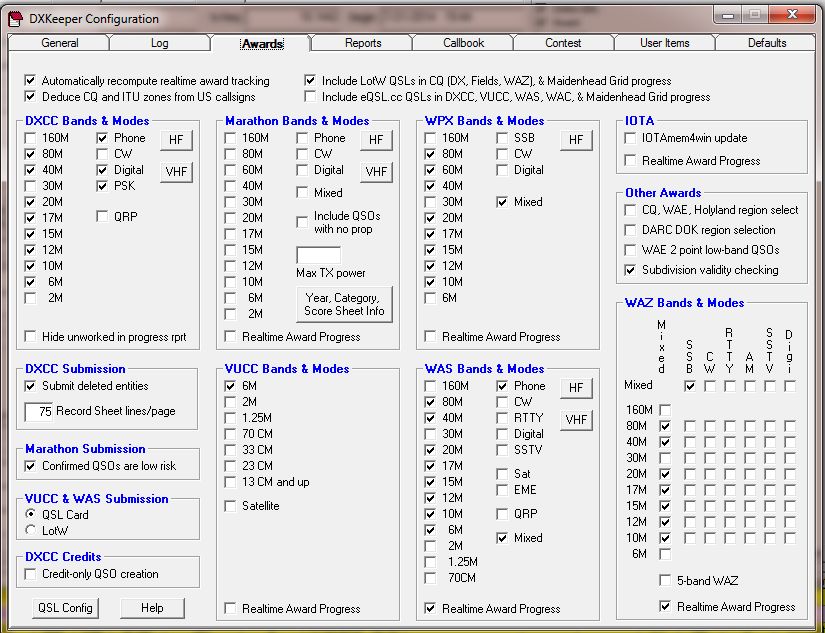
Configure location of you log and backup folder. Make sure you set a backup to a different drive or external device if possible. This is also where you would create additional logs for a contest etc. Make sure you select your default QTH ID. QTHs are set under the my QTHs on the main screen of DXKeeper. The Log Pannels mimics what was set on the main screen and visa versa. Log display allows you to configure the log book display. Awards tab
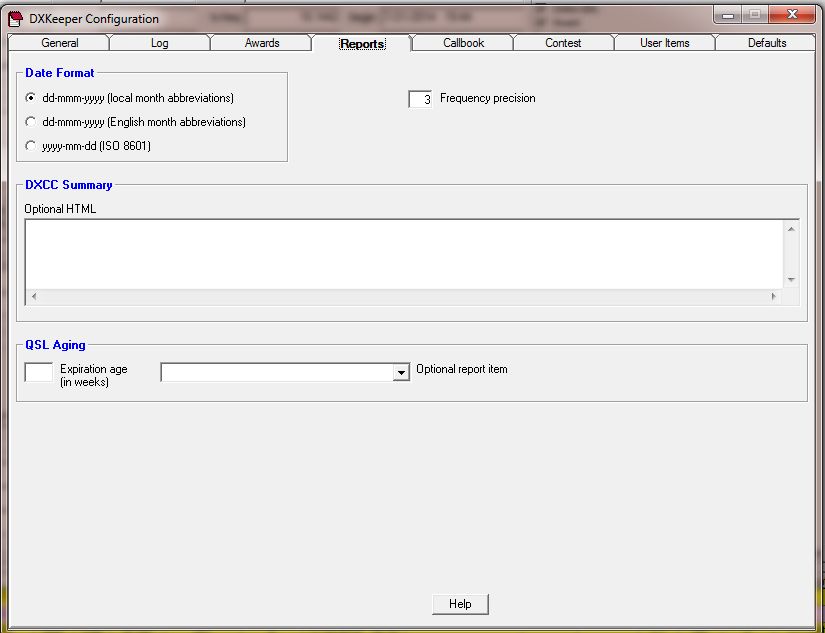
Setup all your award requirements here. Reports tab
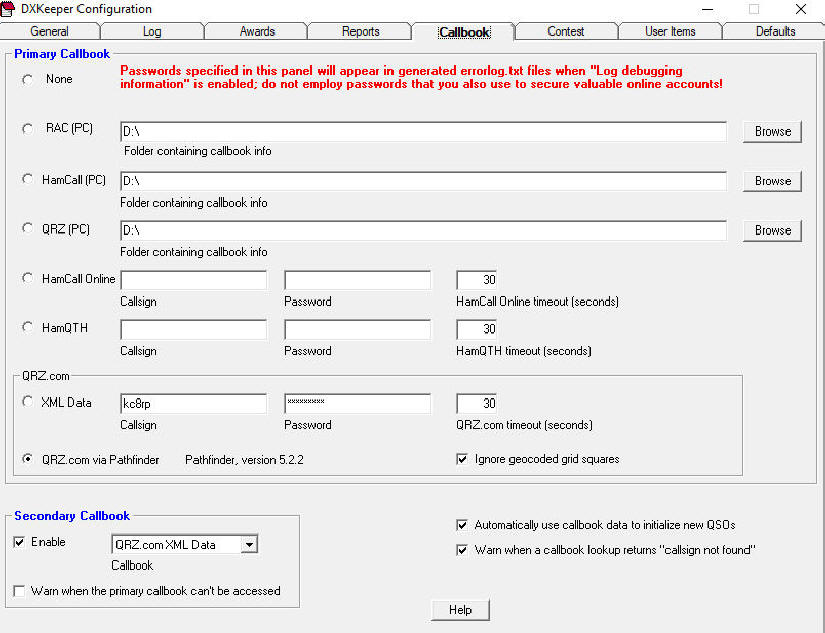
Allows you to configure reports tha DXKeeper generates. Callbook tab
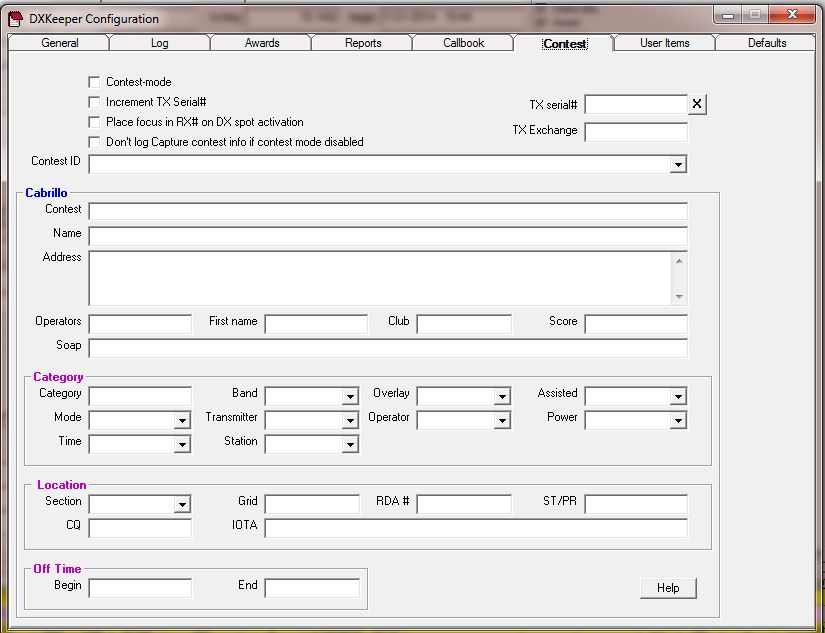
Location to setup any subscription callbooks. Contest tab
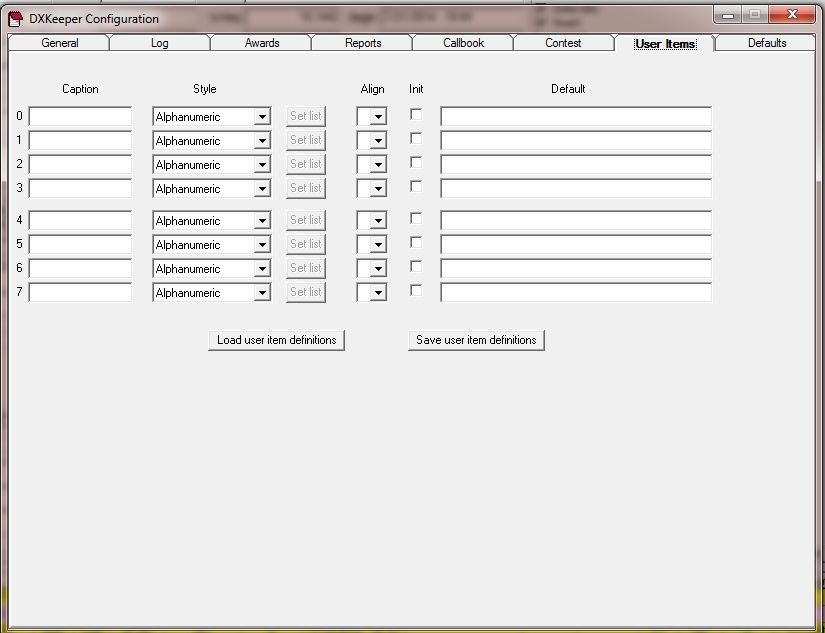
Contest information is setup here. I highly recommend a separate database, Qs can be imported later if desired. The Contest ID drop down arrow will give you a list of contests. I also recommend testing with a few Qs prior to start of contest. This is not a N1MM contest logger but is adequate. User Items tab
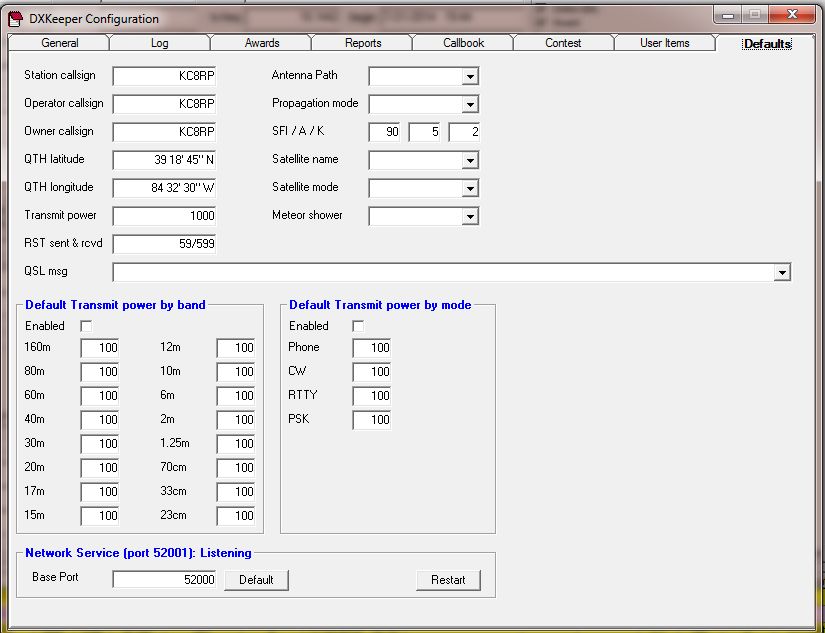
I do not use this screen, maybe you will find a use for it. Default tab
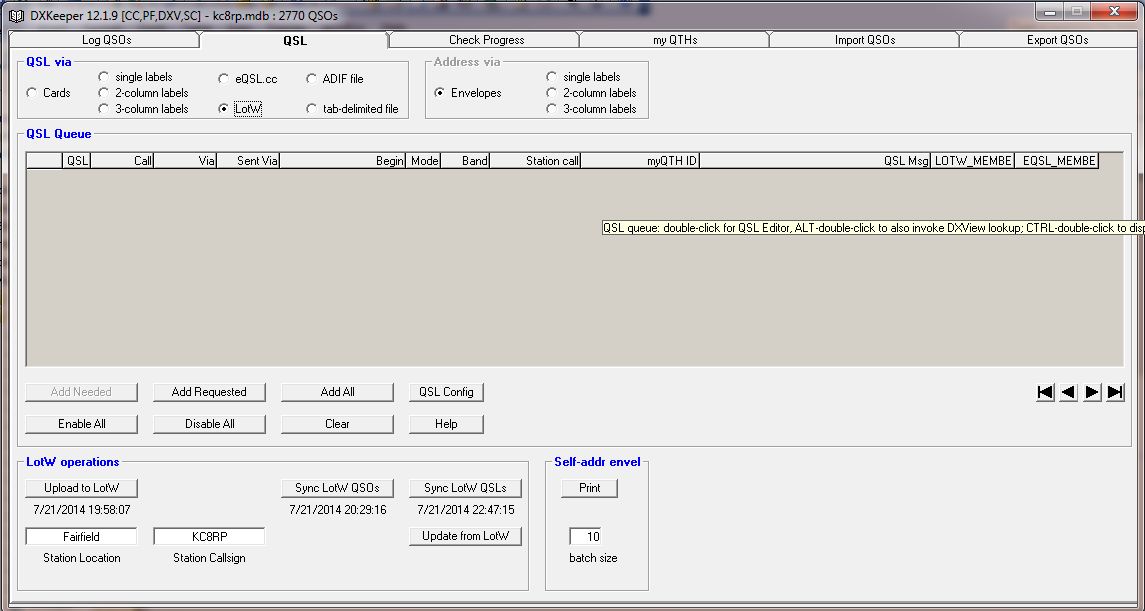
Set all your default values here. QSL tab on main screen
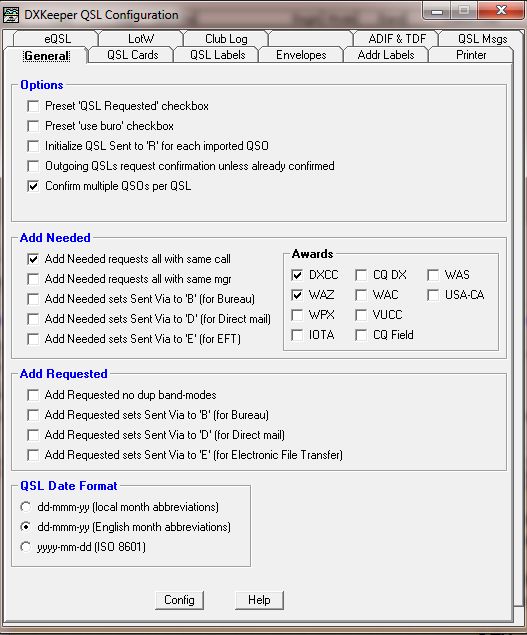
QSL configuration The QSL tab is very important when it comes to confirming QSLs. You can select your preferred method of QSL in the “QSL via” box. These selections use the “QSL queue” window for processing QSL requests. There are 2 ways to populate this window, when in the log you can right click on the QSO and add to queue or you can click on the “Add Requested” button and it will populate the queue with all QSOs that have not been sent a request. I have a special page for QSL cards, labels and envelope printing. Uploading eQSL and LoTW is easy and efficient. The first thing you have to do is setup your eQSL and LoTW accounts. To setup eQSL go to the configuration screen and enter the password and username and that is it, with LoTW you must setup your TQSL.EXE path name. Setting up LoTW is not hard and I will discuss it later. Now comes the easy part. Let say you worked the weekend CQ World Wide contest and you want to upload all your contacts to eQSL, LoTW or both. If you click the button Add Requested all contacts that have not been uploaded will appear in the “QSL Queue” window. Depending on which you have selected in the “QSL via” window, eQSL or LoTW, will determine which online service will be used. The buttons at the bottom will change depending on which one you have selected. Once you have the “Add Requested” to the “QSL Queue” with QSO's simply click the Upload to LoTW or eQSL button and away they go, assuming you have a network connection. Every uploaded QSO is marked in the log as uploaded. eQSL is marked with a Y but LoTW is marked with a U. LoTW does not change to a Y until you click on “Sync LoTW QSOs”. This will take some time depending on the database user load; I have seen it take a weekend to do. The next part is the QSL confirmation. eQSL only has a "Sync eQSL.cc QSLs" button it does not have a Sync eQSL QSOs button. LoTW has a "Sync LoTW QSOs" button, it confirms that your contacts have been posted to LoTW databases and updates the log contact with Y in the recvd box as well as the date. With eQSL a WEB screen comes up showing you the status of your contact, was it needed for an award or not. With LoTW a Notepad file is created and displayed tell you the status. All this information is used later in the Check Progress tab. If this is your first time to upload you can click on Add All and upload your entire log book. IT IS BEYOND ME WHY HAMS HAVE SO MUCH TROUBLE WITH UPLOADING TO LoTW!!!! QSL Configuration General tab
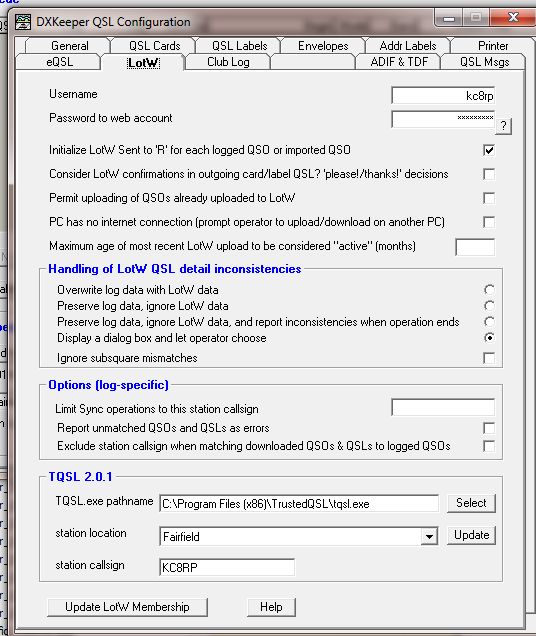
Configure to suite your needs. Don't forget the help screen. QSL LotW tab
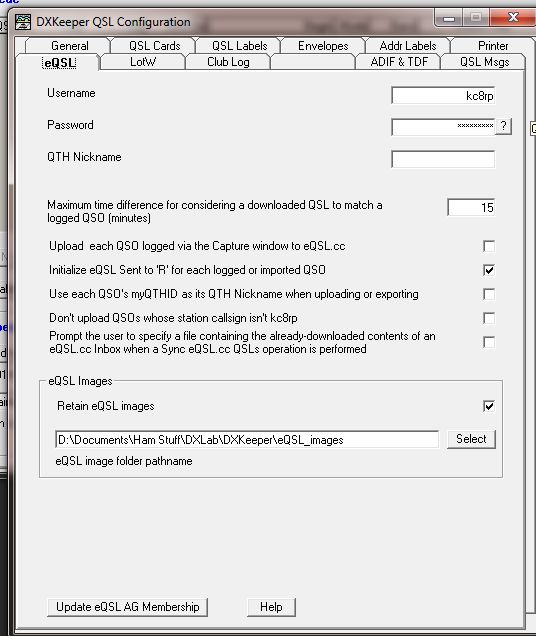
This is the QSL configuration screen for LoTW. The most important items on this screen are the Username, Password to web account and the TQSL information at the bottom. I will describe this setups later. QSL eQSL tab
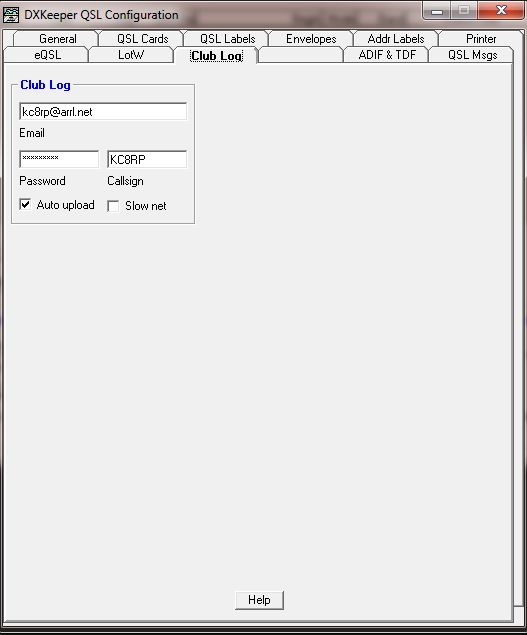
This is the eQSL configuration screen. Once again the Username and Password are the only required items. If you want to download the eQL card images with info then setup the download directory, there are no download images for LoTW in other words no printable QSL card. QSL Club Log tab
If you have a Club Log account, set it up here. I recommend signing up, it is free and the easiest way to request QSL cards from participating calls. Most if not all DXpeditions upload to Club Log and a quick way to confirm the contact. I set my contacts to upload automatically. This is all I plan to discuss on QSL configuration. The rest has to do with setting up for a QSL or label print. You might want to review the General tab for default date formats etc. myQTHs tab
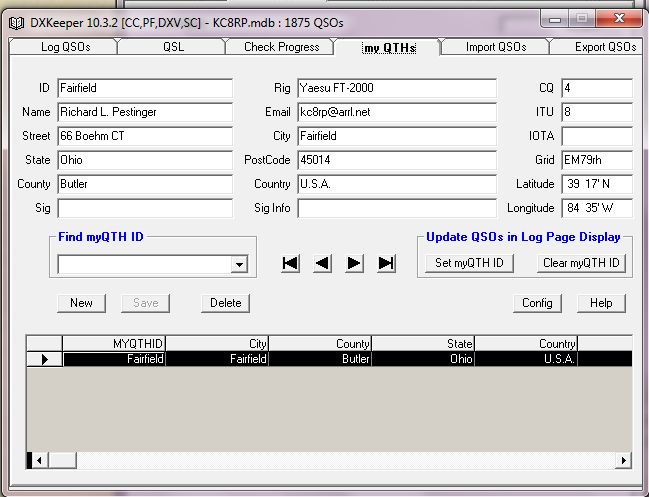
Setup all your QTH information on the my QTH tab. You can have multiple QTHs but I only use one. The new button is used to setup additional QTHs. The config button opens DXKeeper configuration log tab where you can set you default QTH for automatic log fill in. Use the Help button, very helpful!! Import QSOs tab
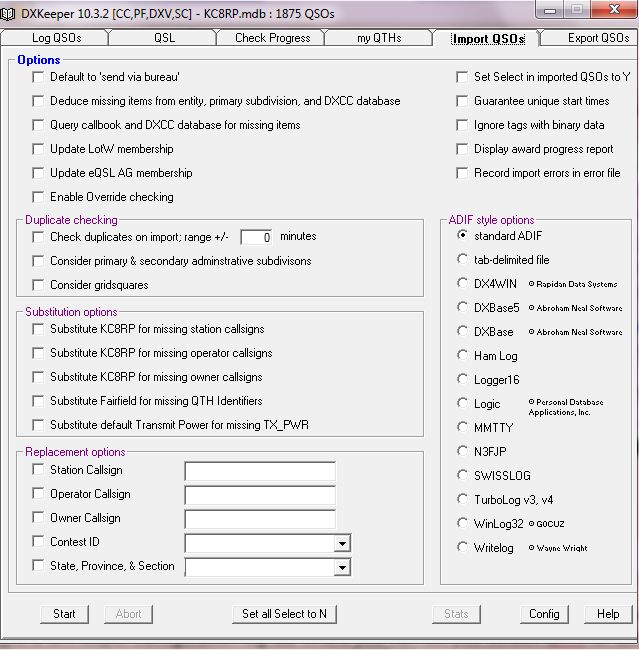
The import tab is useful if you are moving your data from another log book. If you logbook is not listed than I suggest exporting from your old log software to a standard ADIF file. The rest you can play around with and use the HELP button. Export QSOs tab
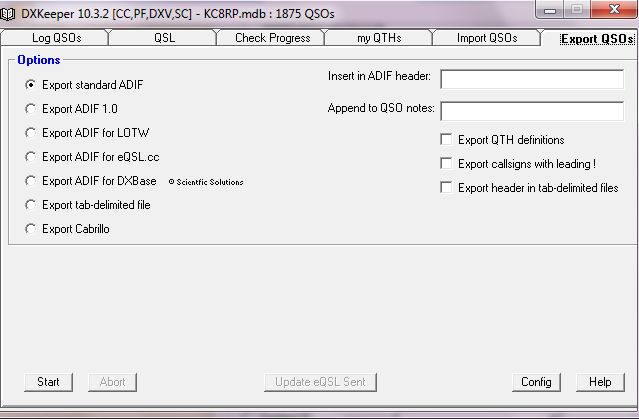
The export screen allows for different ways to get data out of your log into another format. I would recommend using ADIF or for contests Cabrillo. If your computer does not have a network connection then exporting as LoTW or eQSL for uploading on another computer is very useful. tab delimited is also very generic and great for transferring to Excel etc. This is it for DXKeeper, if I find some needed changes I will make them otherwise I suggest using the Help button often.
|